Here’s how you can enable live chat to your Shopify store once you have installed our Shopify app on your store:
- Login to your account and go to the settings page.
- Click [Live Chat, Self-Service Widget] and [Edit] the store where you wish to activate live chat.

- Go to the [Live Chat] tab and turn on Live Chat Availability for your store. Then click [Save]. Turning on Live Chat also turns on the Self-Service Widget if it was off. On the same tab you can also edit the Live chat CTA text, the Welcome message, the Outside business hours message and the Message us input placeholder. If you see the message “Finish a quick Shopify change first”, click [Fix It Now] and follow the steps on that page: open your Shopify theme editor, turn on the “Self Serve Widget” switch under App embeds, click Save in Shopify, then click [I've Done This] in DelightChat. After that, come back and turn on Live Chat Availability again.
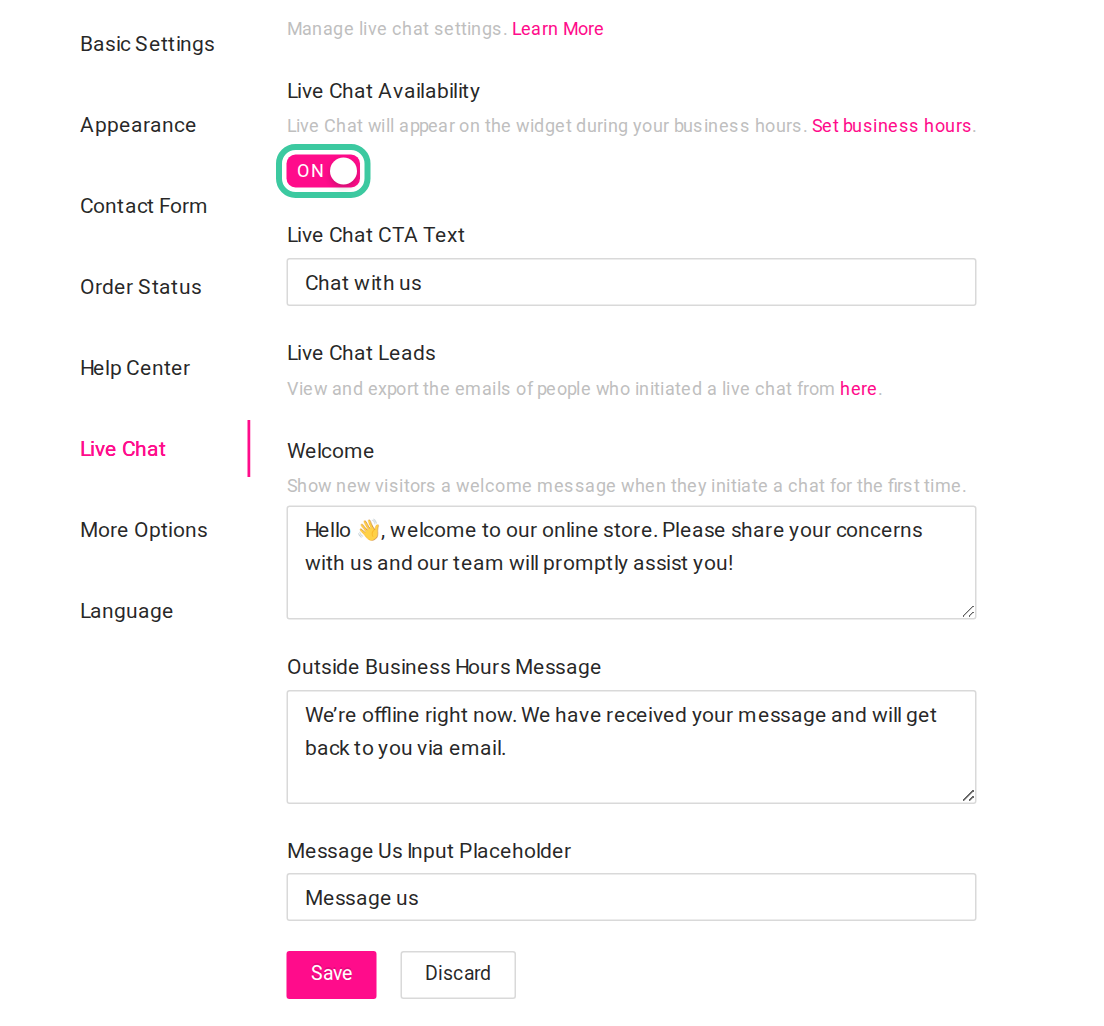
Setup your business hours
The live chat option is designed to be visible only during business hours so customers can only leave a message when they come across your website outside of the working hours.
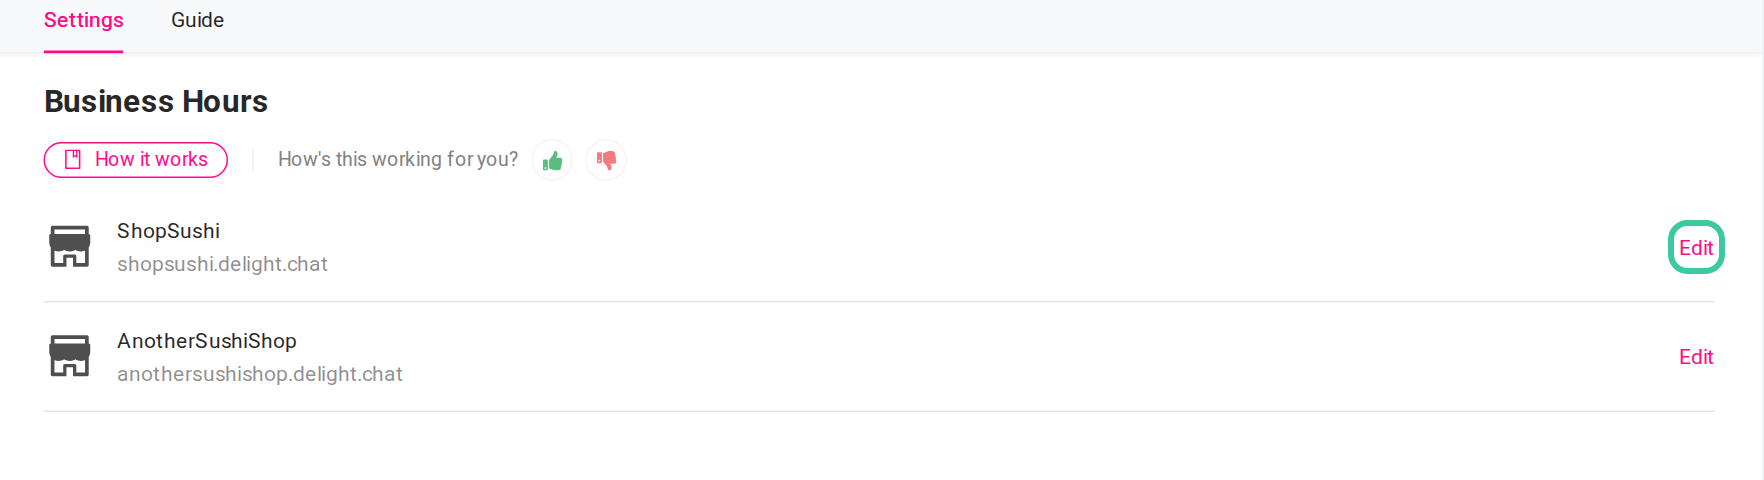
- Add your business hours by going to [Settings] and then [Business Hours]
- Next, click [Edit] for the brand where you want to add the business hours
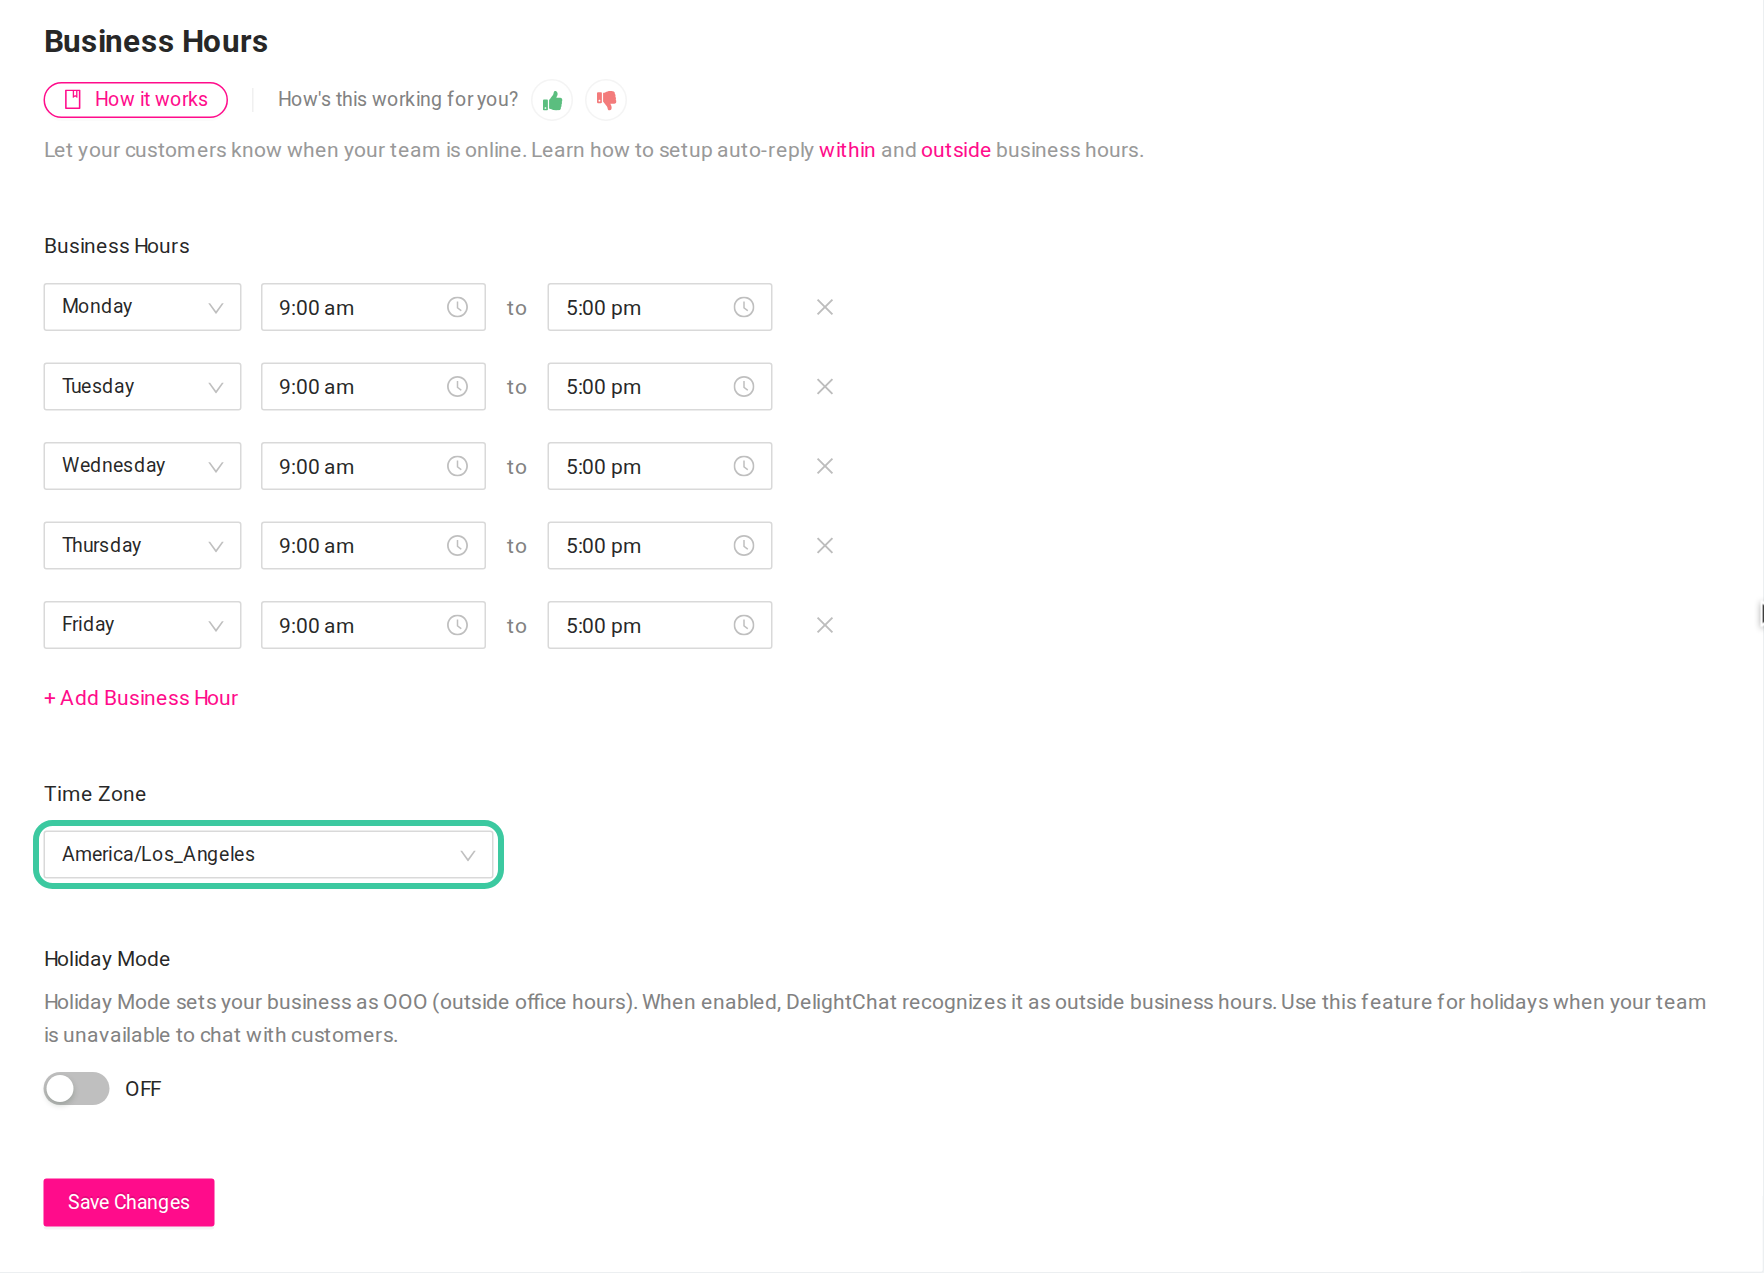
- Setup the business hours for the work week as shown below.
4. Here’s how your customers see the live chat option on your website, and how you can reply to your customers.

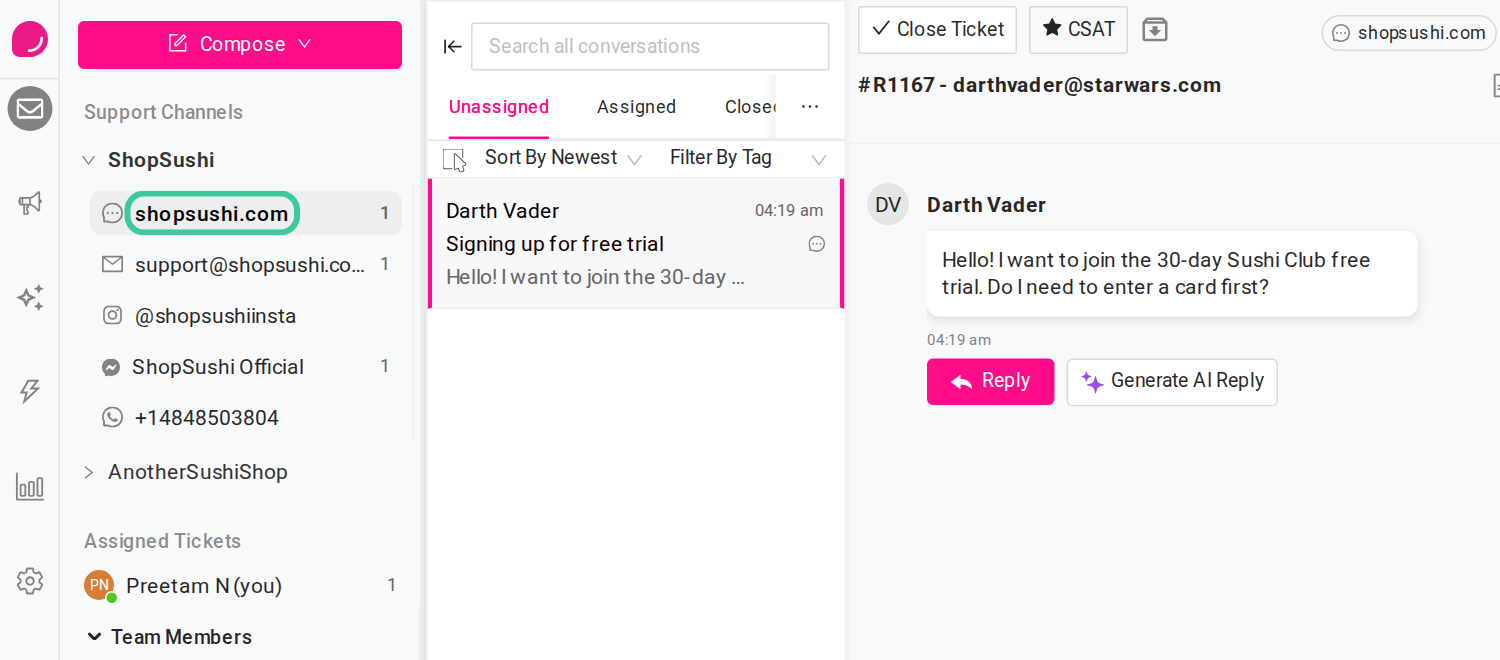
5. On your DelightChat dashboard, you’ll now have a Live Chat support channel where you receive any messages in real-time.
That’s it! You’re all set with live chat on your store.
We’re continually adding new features to the live chat and improving the live chat experience for your customers and your agents.
If you have any feature suggestions, do not hesitate to reach out to support@delight.chat.