DelightChat allows you to connect your email accounts on a single shared inbox to help your support team respond to customers. Email integration on DelightChat works with the help of forwarding.
Let’s look at the steps to integrate Email with DelightChat:
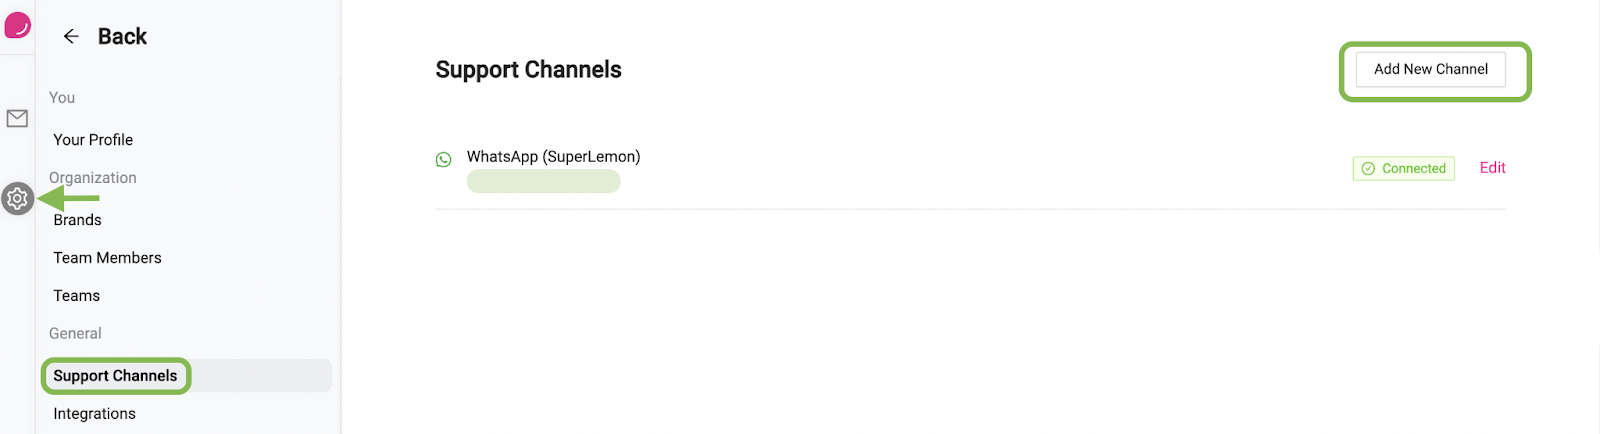
- Click on the Settings icon from the left navigation menu
- Select [Support Channels] and click [Add New Channel] (highlighted in the screenshot below)
- Now click [Add] beside the email support channel

- Enter the email address you wish to add as a support channel on DelightChat . If your account has more than one brand, also choose the Brand for this email. Then click [Proceed to next step]

- In the next step, you’ll see a forwarding address where you need to forward all your emails to. We’ve added short text and video guides to help you set up email forwarding for the major email providers.

- After you have completed the forwarding, click [Verify Email Forwarding]. Our systems will send a test email to your email address.
- The [Proceed to next step] button stays greyed out until the test succeeds.

If the verification succeeds, your email channel is integrated and new customer emails will be available on DelightChat. To send replies from your own business domain (for example, support@yourstore.com), complete one more step. Open the new email channel, find “Final Step: Configure DNS Records”, and click [Configure DNS Records]. You can also find it under Settings > Email DNS Records. This takes about 2 to 3 minutes. If your email is a Gmail or Outlook address, you can ignore this step.