Setting Up Automation Using Shopify Triggers
You can create automations in DelightChat using Shopify triggers to automatically send WhatsApp messages based on store events such as new orders, order fulfillment, or customer actions.
This helps you automate customer communication such as order confirmations, post-purchase messages, and abandoned cart reminders.
Step 1: Login DelightChat
Log in to your DelightChat dashboard, navigate to Marketing → Automations, and click New Automation to create a new workflow
.png)
.png)
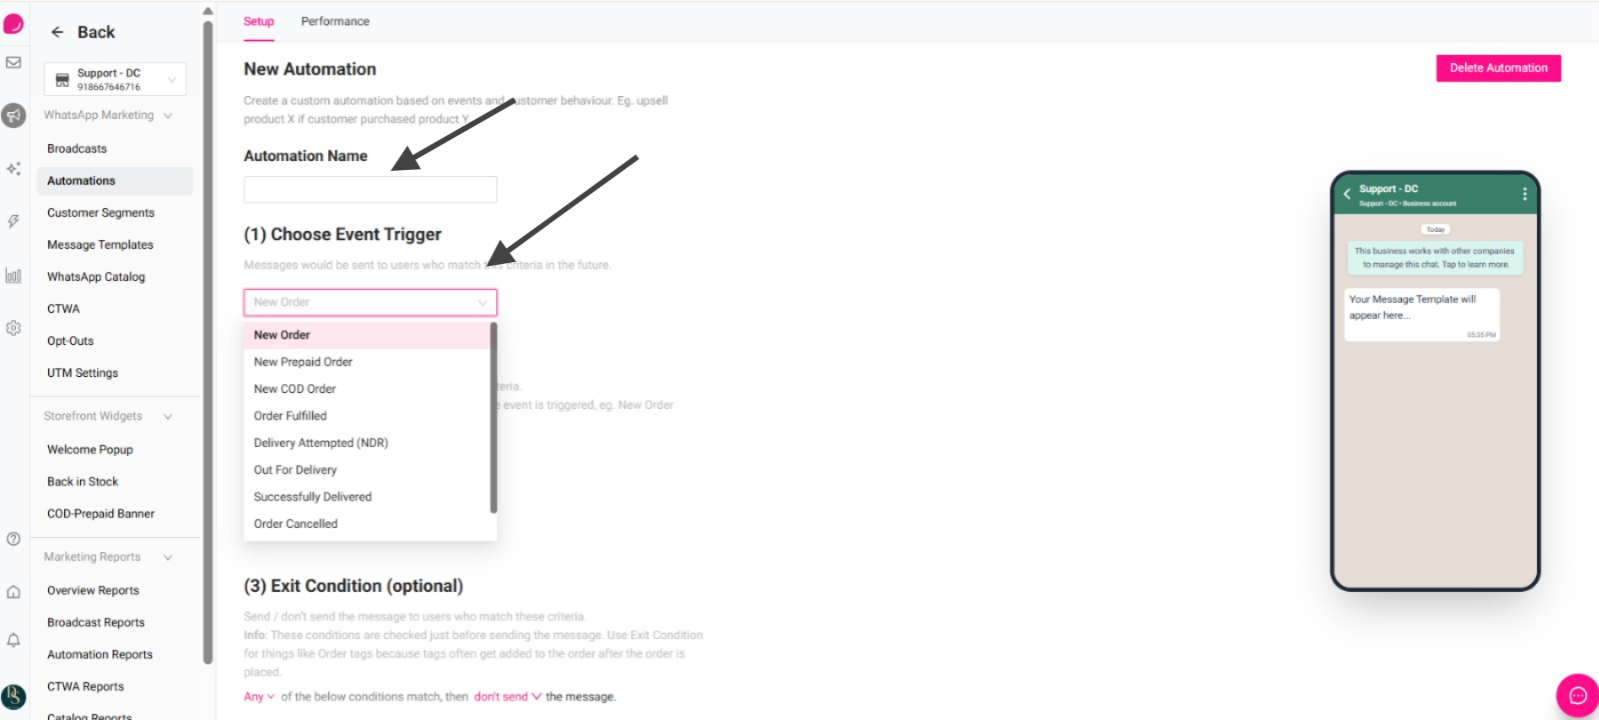
Step 2: Enter the Automation Name
a) In the Automation Name field, enter a name for your automation. This helps you easily identify the automation later.
b) Choose an Event Trigger - Under Choose Event Trigger, select the Shopify event that will start the automation.
Example triggers include:
- New Order
- Order Fulfilled
- Successfully Delivered
Whenever the selected event occurs, the automation will run automatically.
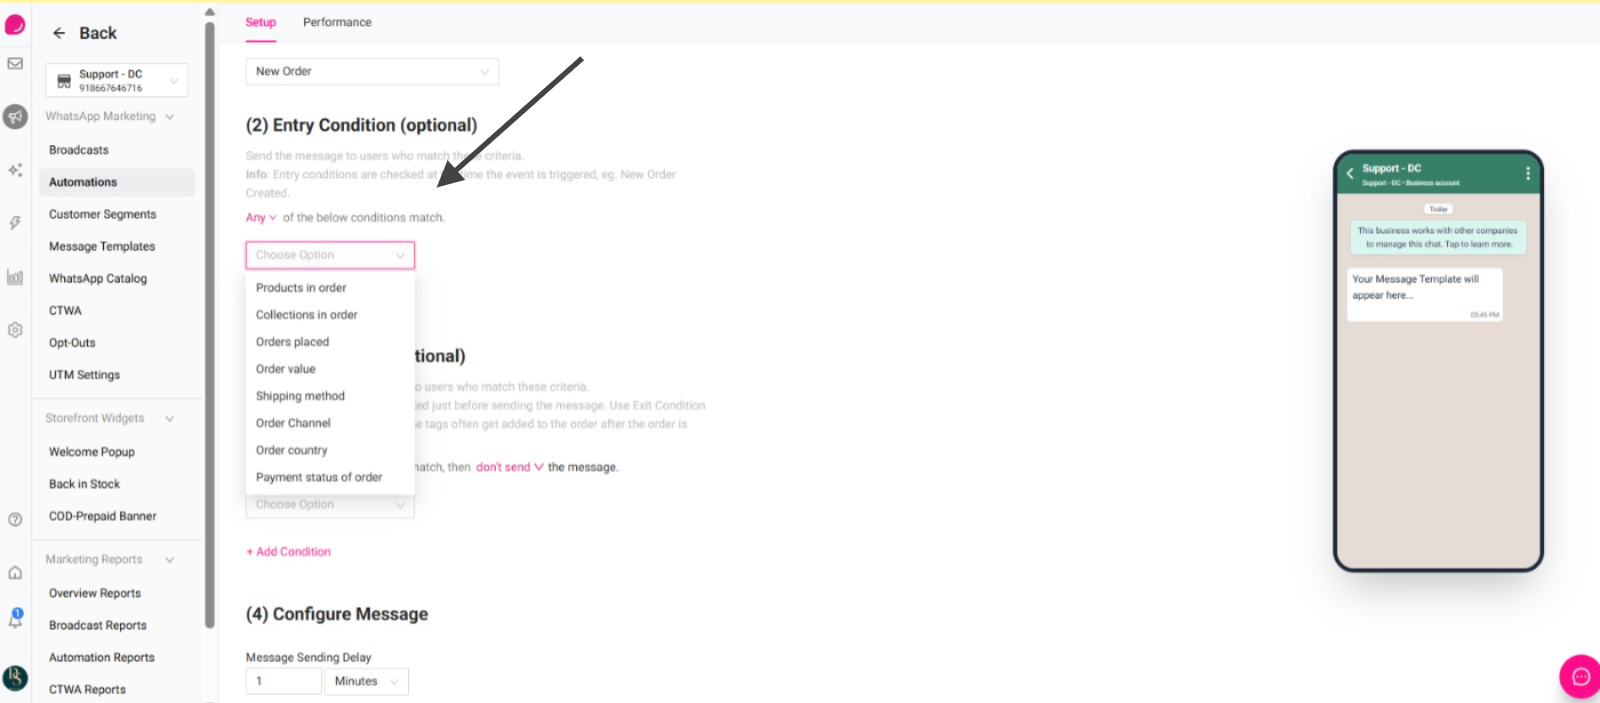
Step 3: Add Entry Conditions (Optional) and Exit Conditions (Optional)
Entry conditions :
Allow you to send messages only when specific criteria are met. Click Choose Option to select a condition.
Exit conditions:
Allow you to prevent the message from being sent if certain conditions match. These conditions are checked right before the message is sent.
Example:
- Do not send the message if the order contains a specific tag.
.png)
Step 4: Configure the Message
Next, configure how the message should be sent.
Message Sending Delay
Choose how long after the trigger event the message should be sent. You can set the delay in minutes, hours, or days depending on when you want the message to be delivered. The minimum delay allowed is 1 minute.
.jpg)
Step 5: Select Message Template
With DelightChat, you can create WhatsApp message templates according to your requirements, and if they get approved, you can use them anywhere such as the WhatsApp Abandoned Checkout automation.
You can now set a static or dynamic image in your automated message. Please ensure that your message template includes a header image.
.jpg)
Choose the Variable - Select the variable that should replace the placeholder in your message template.
For example, you can choose Customer First Name so the message automatically includes the customer’s name.
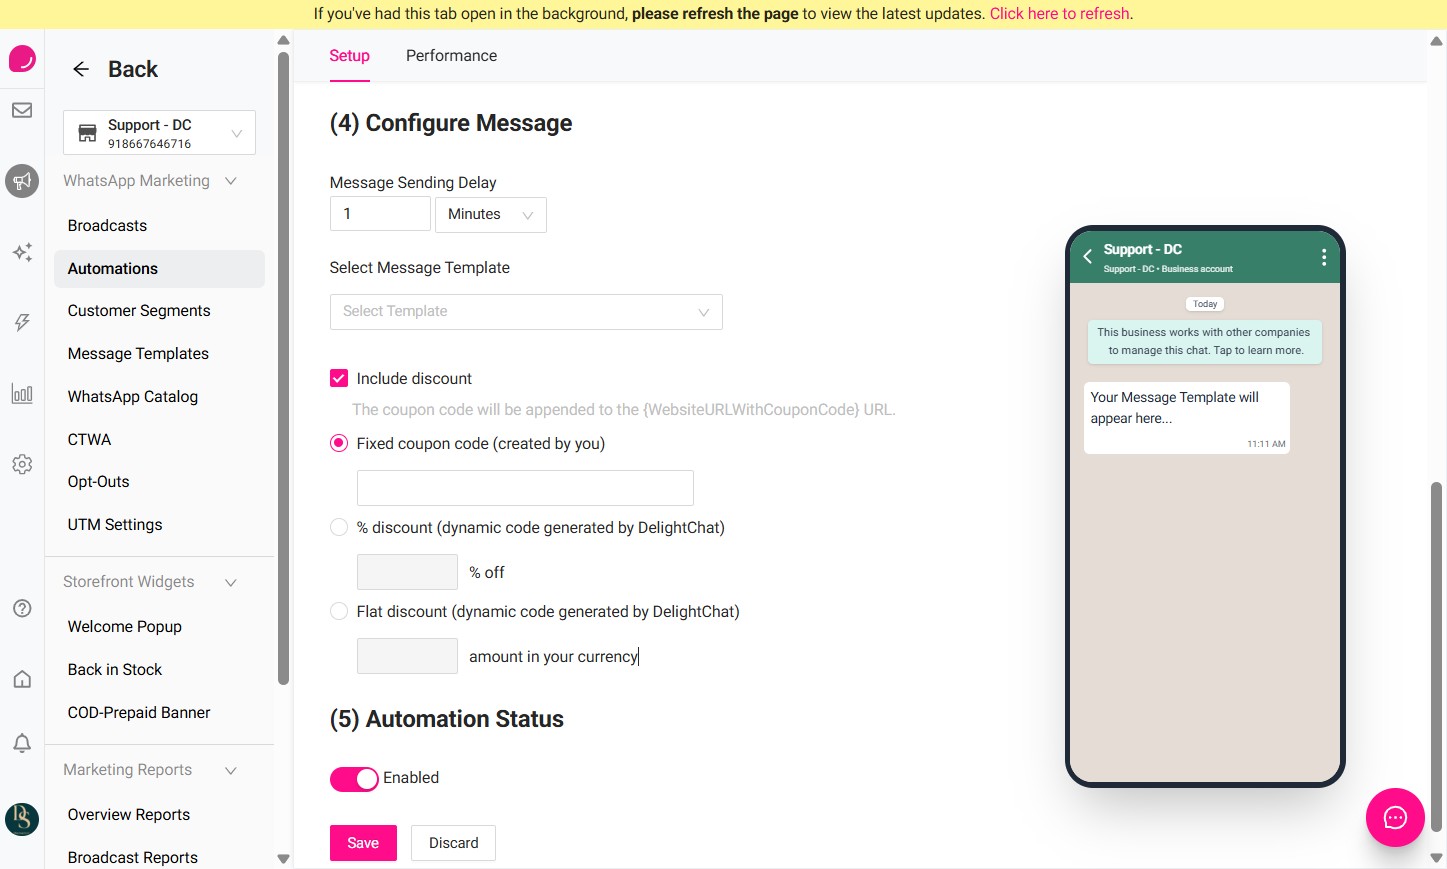
Step 6: Include Discount (Optional)
You can add a discount coupon to your automated WhatsApp message. When enabled, the coupon code will automatically be appended to the {WebsiteURLWithCouponCode} link in your message template.
To include a discount:
- Enable the Include discount option.
- Choose the type of coupon you want to send.
Fixed Coupon Code
Select Fixed coupon code (created by you) and enter a coupon code that already exists in your store.
Example:WELCOME10
This will send the same coupon code to every customer.
Percentage Discount
Select % discount (dynamic code generated by DelightChat) and enter the percentage value.
Example:10% off
DelightChat will generate a unique coupon code for each customer.
Flat Discount
Select Flat discount (dynamic code generated by DelightChat) and enter the discount amount.
Example:₹100 off
A unique coupon code will be generated automatically for each customer.
.png)
Step 7: Enable Automation and Save
Automation Status
Turn on the Enabled toggle to activate the automation.
If this option is disabled, the automation will be saved but messages will not be sent.
Save the Automation
Click Save to finalize and activate your automation.
Once enabled, the automation will automatically send messages when the selected Shopify trigger and conditions are met.