You can automate tagging of your tickets by identifying keywords in the tickets. This makes it easy to tag all the common queries without additional work.
Here’s how you can automate ticket tagging:
- Go to [Inbox Workflows] from the Settings menu and click [+New Rule].

- Next, enter the name of the rule and switch the rule on
- Under “When”, select the channels that you want the rule to be active on, and if the rule should run on new ticket creation and/or when there is a new message on an existing ticket.
- Select the conditions when the automation should run. In our case, we’ll use the “Message body” > “Contains any of” > the keywords that identify this type of query (separate them with commas)
- Finally, select the action under the “THEN” section by selecting “Add Tag”.
- Next, select the tag that you need to assign based on the keywords you added in the previous step. You can even create a new tag by typing it in the input box.
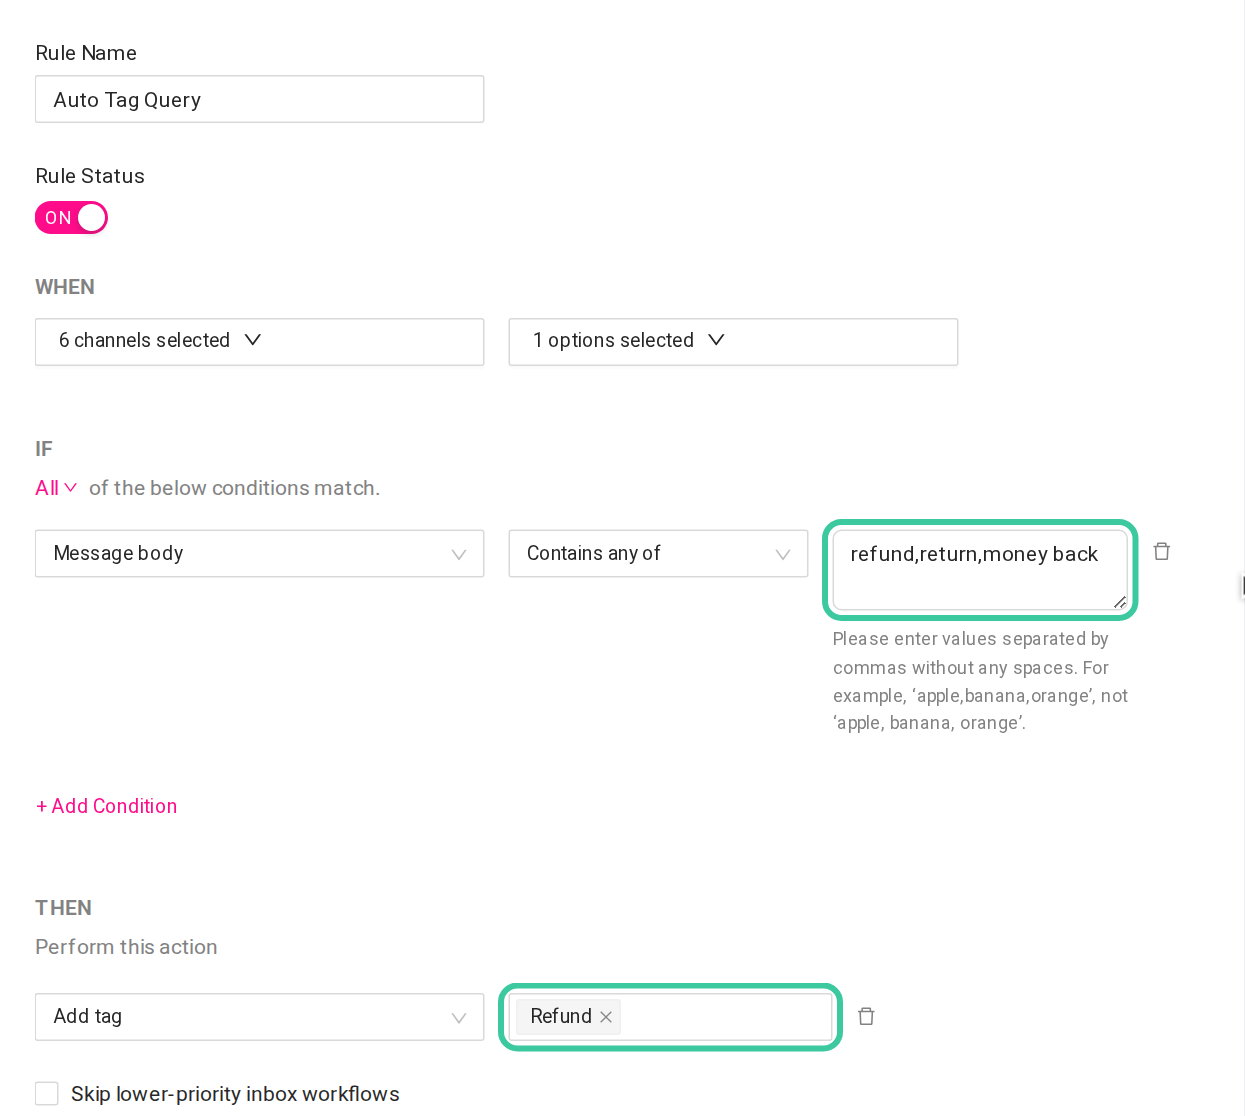
7. Once you’re all set, click [Save Rule]
Frequently Asked Questions
▼
Tags help categorize, prioritize, or label conversations/tickets for better workflow management.
Go to Tags in the Settings menu and click the “+ Create Tag” button - Enter the desired tag name in the text field (Use descriptive names). - Click Save.
From the Tags panel, select the tag you want to edit, update the Tag Name, Color, or Text Color, click Save to apply changes.
Select the tag from the list on the left . Click the Delete Tag button. Confirm the deletion.