To send emails from DelightChat, you need to set the DNS records. While the process is fairly straightforward, a developer in the team can help complete this one time setup.
Before we begin, you need to understand that DNS setup is required so that emails you send via DelightChat actually go from your own email address, say support@brandname.com, as opposed to an internal address such as support@brandname.delight.chat.
Here are the steps to configure DNS records for your emails:
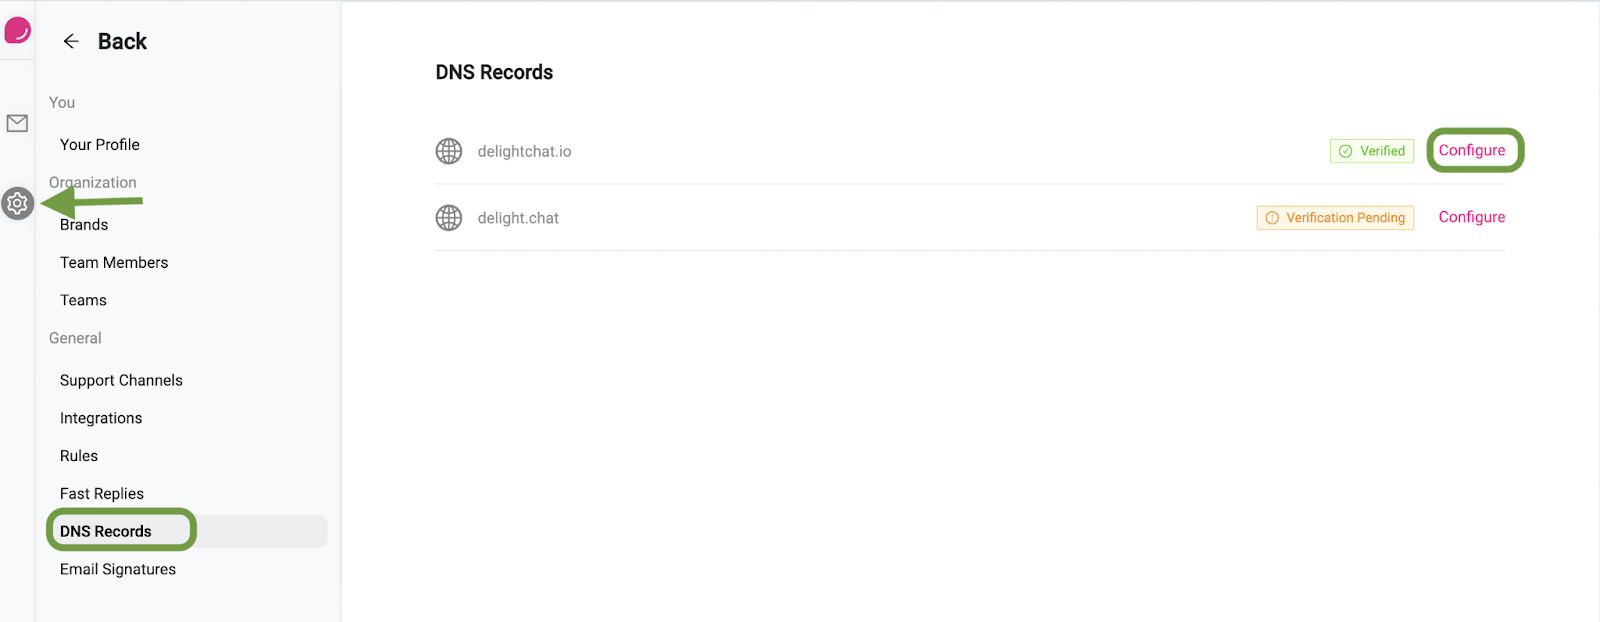
- Click the settings icon from the left navigation menu.
- Now select [DNS Records] and click [Configure] beside the domain name you wish to send emails from (highlighted in the screenshot below)

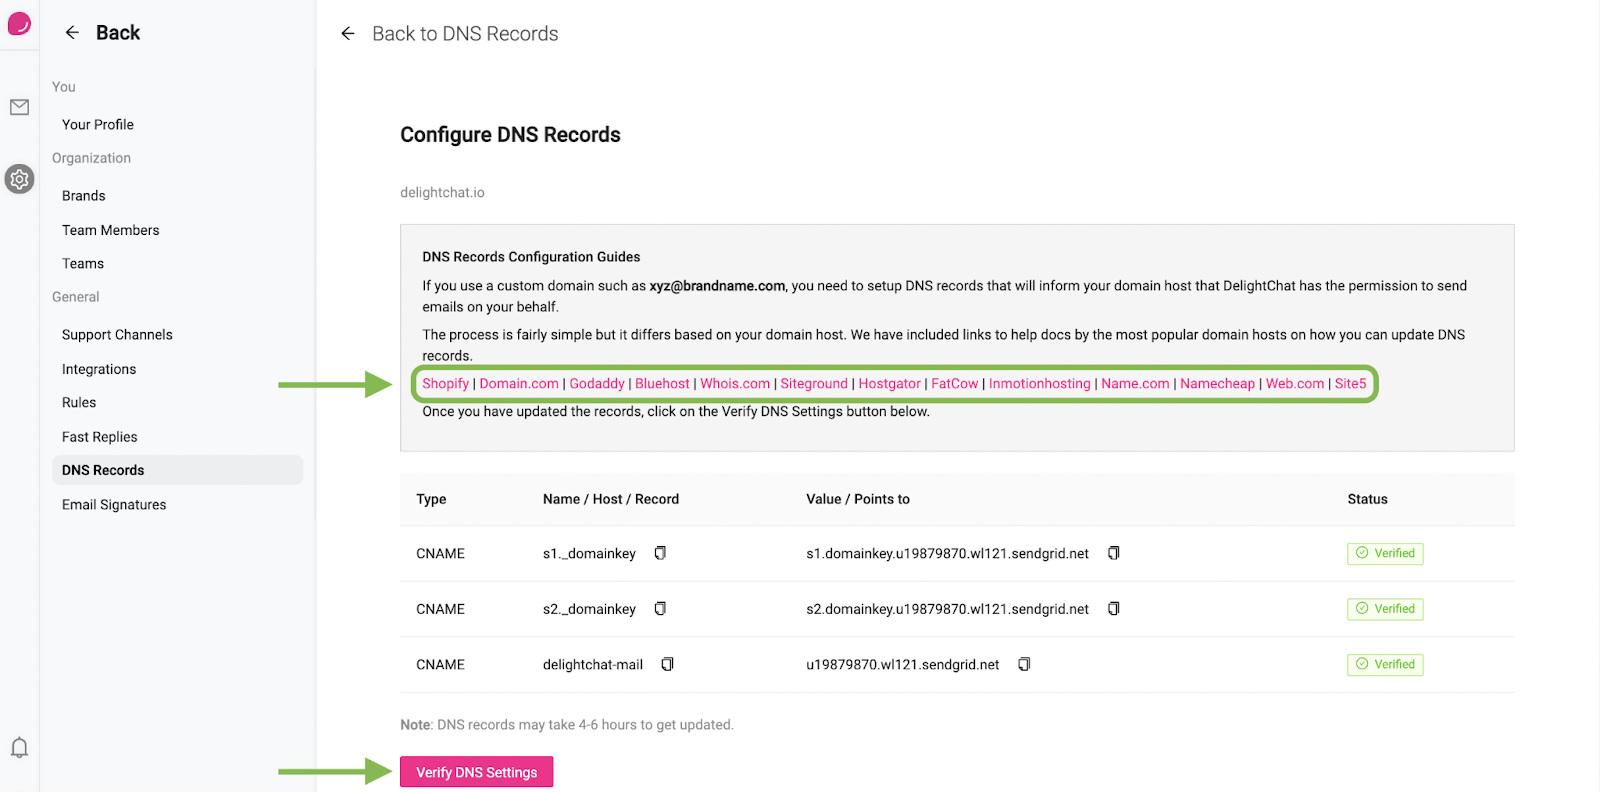
- The next screen will display the DNS records for your domain. Since the steps for each domain name provider are different, we've added links to help docs for the most popular providers.

- After you’ve added the domain records, it may take up to 6 hours for the records to be updated.
- Click [Verify DNS Settings] at any time to check if the records are updated.
- If the records are updated, the status of will change from “Verification Pending” to “Verified” as you can see in the screenshot.
ℹ️ NOTE: The records are pushed on the servers by your domain name provider. If the verification continues to fail after you have updated the records correctly, please wait until the changes are updated.
Once the records are verified, you may begin sending emails from the integrated email accounts.

